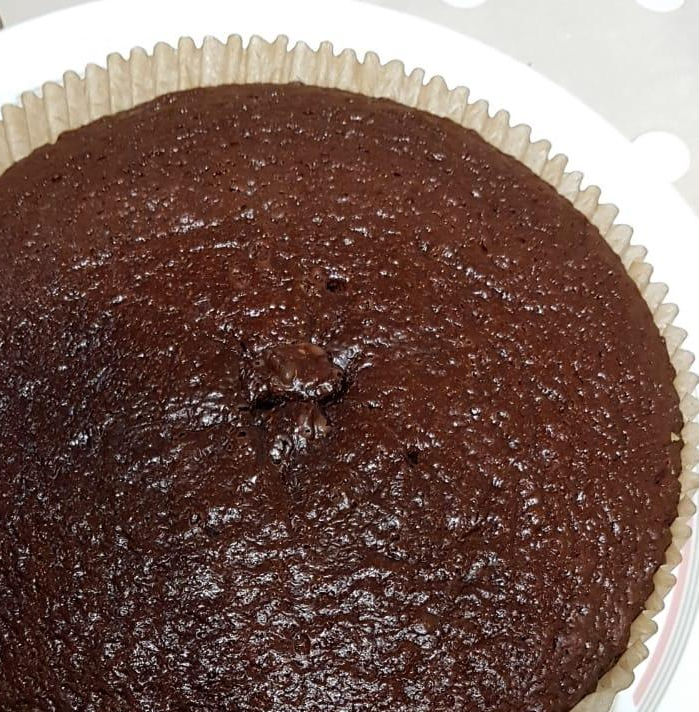
Before you get too excited or think oh no not for me, let me just tell you, the coffee is not there so that you can taste it, it is there to bring out a rich deep flavour of the chocolate, hence why it is mocking you…
you dive in hoping to sneak a hint of coffee, but you are left searching and longing for it to show it self. (Evil, maybe- but its still worth the exploration). INGREDIENTS: 2½ cups self raising flour ¼ tspn baking soda 250grm Chocolate 60 % ½ cup sugar 500 grms dark brown sugar (Muscovado) 1 ½ tspn vanilla 1 cup coffee freshly brewed and filtered ¾ cup hot water 2 eggs 1 cup mayo METHOD: - In a high sided bowl break up the chocolate into small pieces and add in the boiling hot water along with hot filtered coffee. - carefully stir till all the chocolate is melted - add both the sugars into the hot mix and stir until sugar is also melted - In a separate large high sided bowl measure out the flour and baking soda, sifted, (or (when I am in a hurry, or feeling lazy), I use a whisk and give a quick whisk of the dry flour in the mixing bowl, this breaks up any lumps). - Carefully pour in the hot chocolate mixture into the flour bowl whisking slowly as you pour in. - mix well - in a separate small clear glass bowl crack in the eggs and remove any shells that may have slipped in. - next add the mayo, and eggs to the cake mix and mix well - Pour the cake mix into two medium sized cake tins (pre-greased/lined) - bake at 180 degrees Celsius, gas mark 4 (reduce temperature for fan assisted ovens) for about 40-50 minutes or until cooked. To check insert a toothpick in the middle and if it comes out clean it is ready. Best served warm! Or you can leave to cool on a cooling rack and then place in an air tight container. It can be layered and decorated for parties. Left over cake (should such a thing ever occur!! or if you want to hide it away for indulging in in secret later!) always stored in an air tight container or wrapped in cling to stop it from drying out. Keeps for few days out at room temp or for two week in the fridge, unless you invite me over then tis not a crumb in sight.. no not really a cake monster, but I’m sure I could pose as one!
0 Comments
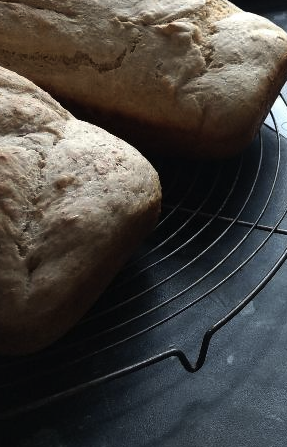
Yields Dough Enough For One 3 lbs Loaf Tin
INGREDIENTS: 500g Strong white bread flour 50g Barley flour 1 and 1/2 tspn instant yeast 3 tspns Demerara sugar 1 tspn salt 2-3 handfulls wholegrain Spelt flour 3/4 pints of luke warm water (430ml) METHOD: -Mix all the dry ingredients in a big high sided mixing bowl -Make a "well" with your fingers in the middle. -Add about a third of the water into the centre then start mixing the water with the flour mix with your finger tips -Trickle in the rest of the water as the first lot of water has started to combine with the flour; keep mixing in the trickling water with the flour. -Once all the water has been added, making sure all dry bits of flour get combined into the dough, now using your whole hand start working the dough into a ball form. -Scrap off any dough sticking to your hand against the rim of the bowl; using your fingertips scrap off any dough from the rim edge and add it back into the centre dough ball. -Now loosly grabbing the front end of the dough ball (the side furthest from you (the side closest being the base end) so that your fingertips roll over the "hidden edge" allowing the heal of your palm to sit comfortably on the middle of the dough ball. -Now using the heal of your palm, push the section of dough in your palm outwards away from you, into the direct of your fingers so that you are stretching out that part of the dough; then without letting go, as part of the continuation action bring back that part of the dough into the centre and gently push the tip end of it, into the centre with your fingertips causing a sort of stretching and folding action. This is "the basic kneading action". -This action needs to be repeat several times with often the need of turning the bowl 90 degrees clockwise, until the dough can become "manageable" enough that you can pick it up and turn the dough 90 degrees clockwise. -Once the dough has come to the stage where it can be turned, leave it to rest for 15 minutes covering with a clean damp cloth. ***** IF USING A STAND MIXER -Mix all the dry ingredients in the stand mixer's bowl -Add about a third of the water into the centre then start the stand mixer on a low speed trickle in the rest of the water as the first lot of water has started to combine with the flour -Once all the water as been added slowly turn up the speed N.B. NEVER GO BEYOND THE RECOMMENDED SPEED FOR DOUGH MIXING FOR YOUR MIXER!) -Mix at the maximum ALLOWED SPEED FOR DOUGH, for about 3-5 minutes a nice smooth consistency should be formed. (ALWAYS FOLLOW YOUR OWN MIXER'S INSTRUCTIONS FOR CONTINUOS RUNNING TIME NEVER EXCEED THIS! If need be, run the mix in several recommended short bursts, giving time for your motor to cool down. -Remove the bowl from the mixer stand and cover with a clean damp cloth and let it rest for 15 minutes. ***** ONCE YOUR DOUGH HAS RESTED: -Grease liberally your loaf tin -On a clean surface sprinkle a handful of the spelt flour, then turn out the dough onto the floured surface. -Sprinkle a little spelt flour on top of the dough ball and taking a dusting on both your hands, start to knead the dough. In this stage the kneading process now needs to be repeated with turning the dough around 90 degrees between each "knead" action. You may need to add few more sprinkles of spelt flour as you work the dough to keep it manageable, you also may find it easier to knead with both hands, where the second is there to more assist with maintaining the dough and adding spelt flour where needed etc, as opposed to actually "kneading" with two hands. -This needs to be continued for around 5 minutes. -After this the dough should feel quite plump and stretchy. -Sprinkle a touch more flour on the worktop surface above your dough ball now face the top "tucking in" centre of the dough to you so that the smoother end is facing away from you and towards the freshly sprinkled flour; place both palms of your hands on the centre of the tucked in end so that your fingers roll over the top. -Now gently push in and out the dough with your palms as you would a rolling pin in the centre. This will make your smooth side dip into the spelt sprinkle causing a nice dusting of spelt on for your top crust. This rolling action also will elongate your dough ball into a cylinder shape. -Once the desired length is reached gently lift it and place it into your well greased loaf tin so that the tucked in bit is at the bottom and the smooth now flour dusted top is facing upwards. -Cover with your clean damp cloth, and leave to rise in a warm place for at least an hour to three hours. BAKING: -Pre-heat oven at 200 degrees Celsius, (Gas mark 6) -Bake at 200 degrees celsius (Gas mark 6) for around 40-50 mins depending on your oven. -To check if the bread is done, it should come out of the tin with ease when flipped over. -To do this you will need to make sure you have a thick folded clean tea towel in your hand to hold the bread with. While holding the hot tin with oven mitts, hold the top of the bread with your tea towel now flip the bread upside down on to your hand with the tea towel, the bread should come out on to the tea towel in your hand, take care not to burn your hand!!!(depending on your tin/greasing sometimes a gentle tap will be needed) Alternatively it can be flipped out on to a wire rack. (if it doesn't come out when flipped even with a tap it needs further cooking give a further 10-15 mins.) -Once it easily comes out the bottom should be a beautiful light brown colour and feel like a nice crust has formed (there should also be a beautiful rustic thin crust at the top) and when brought near your ear and gently tapped on the base with your hand, a hollow sound should be heard, indicating the bread has cooked from the inside and is nice and airy inside giving a nice spongy middle. If the crust has not yet formed but sounds like it has cooked on the inside, put it back in the tin and back into the oven for a further 5 mins. Leave it to cool for at least 10-15 minutes before you attempt to cut it. Its is best enjoyed warm! If on the off chance you are unable to consume it whilst still warm, once fully cooled it can be wrapped in cling film and enjoyed over the next three to four days if kept in a cool place. MY WEIGHING CHEATS: As you may have guessed by now I avoid using scales as far as possible so here is my no weighing cheat; when you are baking with kids the less fuss the more fun. You can use a measuring cup instead of weighing out the flour, 3 x 1 "measuring" cup (250ml size ) strong bread flour 1 x 1/2 "measuring" cup ( 125ml size) Barley Flour Rest of the ingredients as above.
PIZZA CUPS:
N.B. You do not have to make them into cups this recipe can also be used to make normal pizzas too. I made them into cups this time just for a bit of fun for the children For pizza cups you will need two cupcake tin trays containing 12 cups each. INGREDIENTS: DOUGH: 2 cups Plain flour 1 packet Instant yeast 1 and 1/2 tspn Sugar 1 and 1/2 tspn Salt 1/3 cup Oil 1/2 cup Luke warm water PIZZA SAUCE: 1 Onion medium size chopped 2 Garlic cloves finely chopped/ 1 tblspn garlic paste 80-90g Tomato puree 2 Medium tomatoes chopped 3 tblspn Oil 1/2cup Water Dried mix herbs to taste Celery salt two pinchs Salt to taste Chilli/ black pepper to taste Sugar - a pinch or two only if needed to cut the sharpness of tomatoes TOPPINGS: 100g Grated cheddar cheese (give or take depending on how cheesy you like them- also the cheese can be substituted or used in conjunction with buffalo mozzarella, red leicester, monterey jack cheese etc depending on personal taste) METHOD: -Mix together all the ingredients for the dough in a big high sided bowl. -In the bowl knead the mix into a smooth dough ball. ( if it feels a bit too sticky add a sprinkle of flour to your hand and continue to knead) -Once a nice smooth ball has been achieved, work the dough for a further 5 mins in the bowl. (for complete beginners, if you need an explantion of "how to knead" please look at my mixed grain bread reciepe) -portion the dough- *This step will differ depending on whether you are making normal pizzas or cup ones* Pizza cups- portion into small 1 inch balls and place the balls into nonstick/pre-greased cupcake tin cups. Cover the cupcake tray with cling film. Normal- portion into handfull sizes balls and put the portions on a floured tray leaving about 2 inches gap on all sides cover the tray with cling film - Set aside into either an airing cupboard or any other warm place for proofing (if you do not have any such place to keep it, place it in a microwave oven that is off). -leave it in for 1-2 hours the dough should at least double in size -While the dough is proofing make your tomato sauce. -To make the sauce, in a heavy bottom pot add the oil and onions and cook till transparent on a medium heat. (Stirring regularly so it doesn't burn). -Next add the garlic and cook for further 2 mins. -Next add tomatoes and cook for 2-3 minutes (stiring occasionally). -Then add tomato puree and water -Season with salt, chilli/pepper and celery salt. -Cover and leave to simmer, on a low heat, for 10 minutes stirring occasionally. (if it seems to dry off too quickly then add a bit of extra water) -Taste the sauce to check if it tastes too sharp for your liking, if so add the sugar -Add the herbs -Switch off the heat once the sauce has reached your desired consistency.(ideally like a thick paste like sauce, not too runny, but not a stiff paste) -Set aside and leave to cool -Next grate the cheese -Once your dough is ready to use take it out of the airing cupboard/microwave etc -Pre-heat your oven at 180 degrees celsius (gas mark 4) For Pizza cups- -Gently press and shape the dough into the edges of the cup shaping it like a cupcake case. -Put just under a spoon of sauce into each dough cup -Put about 1 and 1/2 tspns of cheese into each cup -Bake at 180 degrees celsius (gas mark 4) for about 15-20mins or until the cup comes out with ease and is a beautiful golden brown colour. For Normal pizzas- -Grease your baking tray (if you need foil on it, foil it and then grease it) -Take one portioned out ball and place on a clean and floured surface where you will be rolling out your dough. -With your fingers gentle press down the ball into a flat disc shape. -Next start to roll out your pizza dough with a floured rolling pin: -(For the benefit of absolute beginners)- -Take a couple of pinches of flour in your palm and rub it up and down the cylinder part of the rolling pin. -Place the floured rolling pin in the centre of your dough so that the centre of the long cylinder part of it is in contact with the dough. If you have handles, holding both handles ( if not then holding the ends of the cylinder in the palm of your hand) pressing down gently roll the rolling pin forwards and backwards a couple of times- this will result in an oval shape with the long side being vertical. -Next lift off the rolling pin and turn the dough 90 degrees to the right so that the long side of the oval is now horizontal. Then place the rolling pin back on the dough as before and roll as before; you should now have a more rounded shape. repeat the above two steps rotating around the dough and rolling several times until the dough is at the desired thickness, (about a cm for thick crust, and about 4-5mm for thin crust)- you may need to sprinkle a little more flour on the surface as you lift and rotate the dough if it is becoming a little sticky to work with. -Place the rolled out dough on to your pre-greased baking tray. -Place about two spoons of sauce in the centre of the rolled out pizza and using the back of the spoon spread out the sauce in a spiral motion going from the centre out to the edges, leaving about a cm of the outer part of the circle free from the sauce as the crust. - Sprinkle about two to three tablespoons of cheese(or as desired) evenly on the sauced part of the pizza -Repeat for all your other dough portions.( If you have a big baking tray that you can fit in more than one pizza place the doughs side by side allowing 3cm of expanding space around them). -Place the baking tray in the oven to bake at 180 degrees celsius, (Gas mark 4) for around 15-20 minutes or until light golden at the bottom. -LET COOL ENOUGH TO HANDLE, ENJOY!
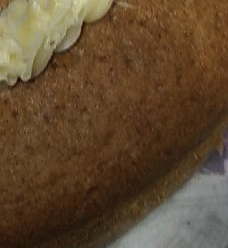
Vegan strawberry cake:
Ingredients: 2 tblspn heaped flaxseed powder 10 tblspn water 2 cups self-raising flour 1 cup (white) sugar 350-400ml blended fresh strawberries (about 8-10 strawberries) 1 cup oil (not level just under full) 1/2 tspn baking soda 1 tspn vanilla extract (you can use essence too) 1/3 cup water (only if needed depending on size of strawberries) Method: -mix flaxseed powder with the 10 tbspn of water in a separate bowl leave to rest on side - blend strawberries - mix flour, baking soda and sugar in a big mixing bowl (a quick dry hand whisk of the two helps remove any lumps therefore reducing the need to sieve, but you can sieve if you like, it will only improve it, but I often skip it due to laziness). - preheat oven to 180 degrees Celsius (Gas mark 4) - line your baking tin with parchment paper/grease your baking tin or use a nonstick silicon cake tin, which ever you fancy (parchment paper is my fav. because it just makes life easier on the other side). - add the blended strawberries and flaxseed paste to the flour and sugar - next add the oil and vanilla start mixing all together. Slowly add the 1/3 cup of water as mixing, mixture should be very thick but pourable (if mixture is already quite loose due to strawberries hold back on the water) - pour mix into baking tin and bake for about 50-60 minutes depending on your oven at 180 degrees Celsius/Gas mark 4 (reduce temperature for fan assisted ovens). Top tip: Avoid opening the oven door whilst the cake is baking. When you come to check at around 50-60 minutes and it looks like it is done nice and golden brown (not when it is looking close to over done -very brown) and you are tempted to take it out to check, leave it in there for a further 5 mins before you go opening the door to check. After 5 mins open the door slowly and using oven mitts take out the cake partially and check with tooth pick/knife. If it comes out clean, you can take it out. If it doesn't put it back in there for further 10-15 mins depending on how wet the tooth pick/knife was. Please note: The above mentioned "cup" measurement is done by a normal household tea mug (namely an old Corelle Corningware mug just so you can have a rough idea of size) it can be done with exact "cup" measurements too but that is a personal choice. I enjoy baking and like to keep it enjoyable so I do it in a stress-free manner; hence I grab my normal tea cup, I don't fluff around with measuring cups and weighing machines when I can avoid it. I believe the energy you put in is the energy you get out. I know you will find exactness being enforced in most baking dishes, well, not with me! With me I enforce happiness, be happy, stress-free and enjoy what you make. Over the years what I have come to the conclusion of is, baking cakes is precise yes but its not taboo to tweak and chop and change within reason. Often I have found people are scared to bake because of these very reasons, this is why I am emphasising that if you are not a confident baker then don't worry, a few grams here or there isn't going to spell disaster! At home I always bake with my kids, I let them throw in the ingredients and mix till their hearts content. I don't use electric mixers just a plain old hand whisk and good old fashion muscle power. Let them enjoy making the cake, don't stress about the mess and exact millimetre perfect measurements, if it doesn't turn out looking like a fancy cake shop cake don't fret over it, they will still love to eat it because they made it themselves! Just like beauty isn't skin deep, nourishment and taste isn't either. It will be full of positive happy soul nourishing energy! Bake Happy, Eat Happy! |

MY RECIPE BOXMy heritage spans from the flavours of Bihar to the cuisine of the Arabias, the colourful food of Bengal to the delicacies of Pakistan. SEARCH BY TYPE:
Categories
All
Archives
April 2023
|