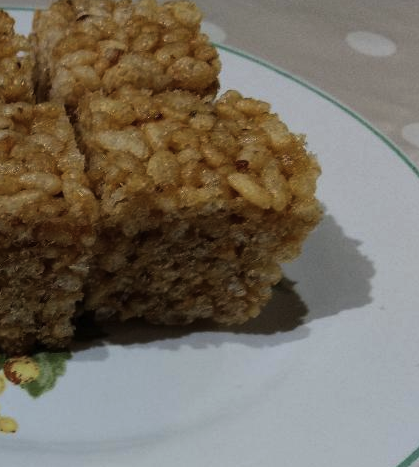
This Recipe I picked up from when I was in Saudi, I do not know to whom to give the credit to, so whoever created this "thank you!!" It is dead easy and delicious!
INGREDIENTS: 120 grms "Rice crispys" 100 grms butter 100 grms sugar 100 grms date paste METHOD: -In a wide and high sided heavy bottom pot on a medium heat, heat up the butter sugar and date paste until it is all melted and starts to just bubble -Remove from heat and working quickly mix in the "rice crispys" evenly. -In a medium heat proof glass rectangle dish, spoon out the mix -Still working quickly, using a flat melamine style turner, press down the mix to a smooth compact even layer, so that the layer is about the thickness you want your finished squares to be (roughly between an inch to and inch and half) -leave to cool for 40-45 minutes -using a butter knife cut into "squares" of your desired size but do not remove from the dish yet. -cover the dish with cling film and leave to fully cool at room temperature. ( about 1 1/2 -2 hours more) -now they should be set enough to remove from the dish for serving, store in an air tight container. VARIATION: one can add melted cooking chocolate on top either drizzled or in a thin smooth layer (apply the chocolate after cutting). TOP TIP: Pressing into a compact layer is the most vital part and needs to be done so that it is as compact as can be, otherwise the square will not hold and fall apart. MY WEIGHING CHEATS: As you know I am always trying to get out of actually weighing ingredients, so for this recipe what I do is, buy 500grms butter 500grms date paste, 700grm pack of rice krispies and a 1kg pack of sugar, I use the whole of the butter, the whole of the dates and half the pack of sugar (just by eye balling it) and I estimate 6/7ths of the rice krispies pack (this ratio yields enough to make three big 8-10 serving size dishes worth of mix). Easy made easier!
0 Comments
AUTHOR: |
AUTHOR: | 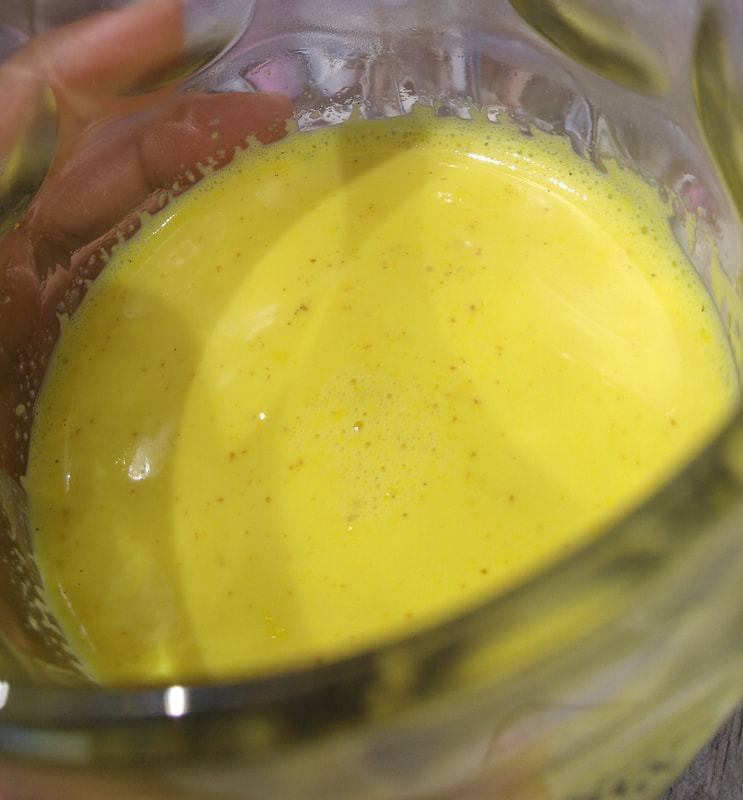 |
Like the name suggests, this is worth its weight in gold!
An Ayurvedic classic, this little treasure has been keeping us healthy through the generations.
There are several versions of this drink and each one suits a purpose. You can make it with simply turmeric and saffron, or you can make it for flu fighting with ginger and ajwaeen, (oregano seeds). I'm sure in Ayurvedic literature you can find many many more variations, but these two are the ones popular in our home. Another favourite is turmeric milk enriched with dry fruits/nuts and saffron.
Not only is it a drink full of healing, but it’s a drink which fills one up with the feeling of love and nurture, its natural warm temperature and beautifully inviting sunshine warmth of golden yellow is an instant pick me up! A perfect drink to snuggle up with on the couch, on late cold winter nights with a blanket and a book, or a movie, which ever you fancy.
Turmeric and saffron milk:
perfect for evening winding down and indulgence, especially those nights when you need a little tlc!
1 cup of whole milk
1/5 tspn of turmeric powder
Pinch of saffron
Combine all the ingredients in a small pot, and gently heat on a medium low flame. Stand over it stirring occasionally, but more importantly to watch the mellow pale yellow slowly turn into a beautiful strong vibrant entity, which in turn lifts up your spirits and elevates your mood. Trust me it does happen, so don't rush around doing other things while this boils away, stay with it and let it heal you completely.
Bring it to a boil then switch it off, pour into your favourite mug, and add a touch of honey if you please. Retreat into your quite corner of the world and switch off from the world to enter into a moment of blissful healing and rejuvenating, best enjoyed hot (like tea).
For extra indulgence scoop in a spoonful of freshly ground nuts/dry fruits.
Turmeric milk, the real flu nurse:
For nature's flu fighting power;
1 inch knob of ginger. peeled and quartered
1 cup of whole milk
1/4 tspn of turmeric powder
pinch of ajwaeen (oregano seeds)
1 tablespoon of raw pure local honey
Combine all the ingredients in a small pot except the honey. Heat on a medium-low heat. Bring to a boil, then reduce heat to low to simmer the milk for 5 minutes. Switch off and pour half out into a mug and add half tblspn of the honey (or more if you like it sweeter). Drink hot, as much as you can bare of course not burning hot, save the other half for later. Have half in the morning and half warmed up again in the evening (with the other half tblspn of honey as before).
For best results combine with lemon and ginger drink and if a chesty cough with ghee mixture.(recipes to follow soon)
Please note, if you suffer from diabetes then you can omit the honey, but if not, it is recommended to have the honey as it is also great to have in flu.
The ginger can be strained out when drinking, but it is better to eat the ajwaeen (oregano seeds), you can either swallow them whole or chew them, but I must warn you it has a slightly bitter taste!
This drink can be given to children above 1 year of age, although the ajwaeen (oregano seeds) should be strained out!
According to UK guidelines honey is not recommended to children under the age of 12 months!
If your child is under any medical treatment or if you have any doubts about giving this drink to children please consult your doctor.
AUTHOR:
MAE
"Ubtan" is an ancient face cleanser/mask/rub that has been used in the indo sub-continent for countless generations. It is especially used prior to marriage as a beautifying ritual for the bride-to-be.
One can buy or make all sorts of ubtans, I am here to share a simple ubtan recipe that we make at home using very basic natural ingredients.
PLEASE NOTE:
***
Different ubtans have different ingredients which may or may not suit everyone, before using any ubtan please do a small patch test and observe for 24 hours before using it all over.
Please do not use if you have any irritation/allergies from any of the ingredients.
***
This recipe calls for four simple ingredients:
Orange peel- any orange: satsumas, tangerines or even big oranges doesn't matter much
Turmeric
Plain Flour
Water (or Rose water if you want to get extra fancy, but plain water works just fine!)
The first step is the longer step, collect a lot of (washed) orange peel, (pst, easier to wash prior to peeling!), then leave them in the hot sun to dry, this can take varied lengths of time depending where you live and how much Sun you get. The peels need to be completely dried out and no not in an oven, in the Sun! No shortcuts for natural things!
Once dried they need to be powdered with either a pestle and mortar or electric spice grinder. Once powdered the ubtan can now be prepared.
Ubtan powder mix:
Orange peel powder 1/2 cup
All purpose/plain flour 1/2 cup
Turmeric powder 1/4 tspn
Mix well and store in an air tight container, can be stored for up to a year.
When you want to use the Ubtan:
In a small bowl/plate/lid take out 1 tblspn of the dry powder mix and mix with water/rose water to make a smooth thick paste (about 1-2 tblspns of water). Apply the paste to your face.
-The ubtan can be left on like a mask or rubbed all over the face like a exfoliating scrub.
If you are using it as a rub:
You can rub it all over the face and neck for 5-10 minutes, then gently dust off the excess and then leave it to dry for further 15-20 minutes before washing it off. Your face can be left for longer before washing and the ubtan can be re-applied several times before washing, as is what is done with brides.
If using as a mask:
Leave on your face till it is dry then dust off any dried on powder and either wash your face straight away or leave it for a bit longer period before washing off.
One can easily leave the face unwashed for several hours, but normally it is not practical and most likely it is washed within 2 hours.
This Ubtan is safe to use several times a day, everyday, or can be used once a week/month however it suits your needs.
This ubtan should give a clean, tighten and glowing look to your skin. Insha Allah.
Much love
x
AUTHOR:
MAE
Tip 1:
Mix dried curry leaves paste 3 heaped tspns into organic natural henna paste and apply liberally to hair cover with an old towel. Keep in for several hours and then rinse out. This is a recipe for a natural dark hair dye that keeps your hair from going grey. ( suitable for people who have dark coloured hair).
Tip 2 :
Mix organic natural henna paste with 1 egg and half a lemon's juice to give a natural hair conditioner which strengthens and shines.
Method:
Apply to hair liberally, cover hair with old towel, leave for several hours. Wash out.
(suitable for people with dark coloured hair- or someone who doesn't mind red and I mean red, like bright orangy/red hair!)
Tip 3:
Mix organic natural henna paste with "sikakae" and "amla" powder for strong, long, healthy and soft hair.
AUTHOR:
MAE
INGREDIENTS:
1 AND 1/2 CUPS SELF RAISING FLOUR
ABOUT 80GRMS BUTTER
3 AND 1/2 TBLSPNS OF SUGAR
1 EGG
2 SPLASHES OF MILK
TWO PINCHES OF SALT
PINCH OF NUTMEG
PINCH OF MACE
TWO PINCHES GINGER
TWO PINCHES CINAMON
(OR ALTERNATELY YOU COULD ADD 1/2 TSPN OF MIXED SPICE)
CHOPPED RAISONS ABOUT 3 TBLSPNS (I ACTUALLY CHOSE NOT TO ADD THEM IN THIS ONE, JUST BECAUSE I FANCIED THEM PLAIN.)
METHOD:
-Mix the flour and butter with your fingertips to a breadcrumb consistency
-Sprinkle in your spice and sugar (if you are adding raisons add them now)
-Add the egg to the flour mix and using your finger tips start to mix in the egg, add in a splash of milk and start to form the dough into a ball, if any dry bits still remain add another splash, you should end up with a soft dough, but not sticky, if it is sticky add a sprinkle of flour.
-On a clean floured surface turn over your dough ready for rolling.
-Roll out your dough to a thickness of about 5mm
-Using a scone cutter cut out as many circles discs as you can- cut with a straight sharp clean cut without twisting. ( This step is fairly easy and children do love to do it!- some more confident ones even love to roll out the dough as you can't really go very wrong with it.)
-Gather the left over dough into a ball and roll out again in the same way to cut out more discs; continue until all the dough has been used up.
-Pre heat with a low heat, a non stick pan
-Place the discs on the warm pan with a couple of millimetres spacing around them
-On a low heat cook for 3 minutes on one side and then flip to cook on the other side, they should be beautiful and brown on both sides.
-Serve straight away, can be eaten plain or with butter, honey, fruit conserve, cream, or anything else that you can imagine up...
AUTHOR:
MAE
This recipe is especially for busy mums who need a quick and simple scone for those last minute snacks. Designed to make on the go with no need of "exactness".
Ingredients:
-3 Handfulls -Self raising flour (add about a tspn of baking soda if using plain flour)
-50-60g -butter (just using the guidlines on the pack of butter at 50g intervals)
-2 splashes -Milk
-1 & 1/2tspn sugar
pinch -salt
-2 pinches -extra flour for sprinkling
-A couple of teaspoons of milk for milk wash
Method:
-In a mixing bowl, add flour, sugar, salt and cold hard butter (straight from the fridge) roughly cut into small pieces.
-Using your fingertips rub the butter into the flour mix giving a "breadcrumb" consistency. (A couple of pieces of butter can still remain in small pieces doesn't all need to be rubbed in, it gives it a nice crumbly scone).
-Add a splash of milk, start to combine into a dough, then add the second splash judging how much more you need to give a soft, but just a little short of "sticky" dough- it needs to be "just beginning to be sticky" consistency.
-Using a pinch of flour, flour your surface where you will roll out your dough.
-Sprinkle a second pinch of flour on top of the dough, roll out to a thickness of about two and half to three centimetres.
-Cut with a floured cutter going straight down and up in one clean action NO twisting.
-Using a pallet knife (or similar) lift and place onto baking tray.
-Pour about a teaspoon of milk in a cup/bowl and using a brush give a milk wash on the tops of the scones taking care that the milk doesn't drip down the sides, otherwise it till not rise evenly. (If you do not have a brush, you can just use your finger to spread the milk on the tops.
-Bake for 15 mins at gas mark 7, -220 degrees Celsius (gas mark 6, -200 degrees Celsius for fan assisted ovens). The tops and bottoms should be lightly golden, and feel like a thin crust has formed on the top.
-Remove and place on wire rack to cool, enjoy hot/warm with your favourite accompaniments.
AUTHOR: | 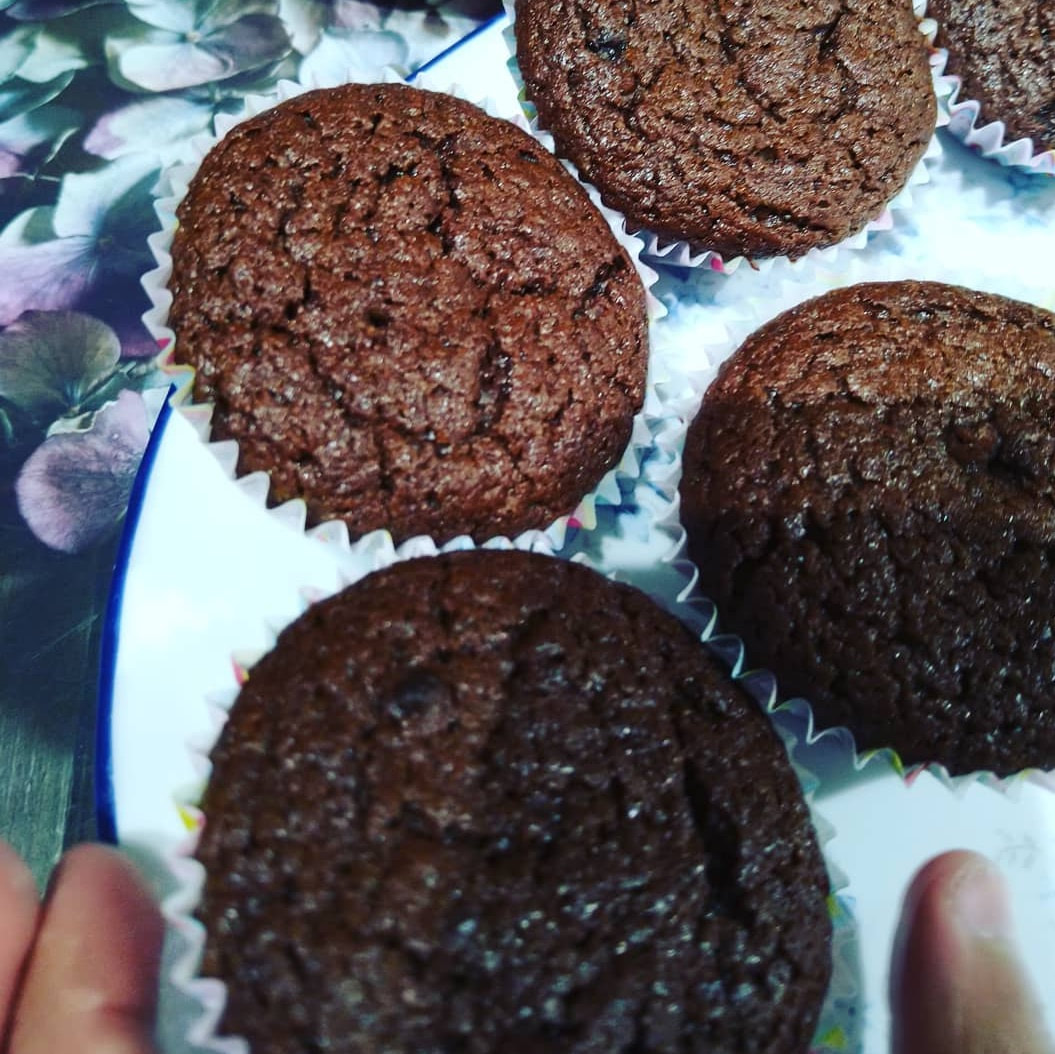 |
For those random times when your children want chocolate cupcakes and you have not really done any shopping to enable it... I had some random bars of chocolate lying around my fridge some leftover syrups so threw them all together for this one!
1 ½ cups self raising flour
½ cup coco powder
50 grms butter
20 grms Drk Chocolate
1 lindt chocolate bunny (50g)
5 tablespoons mayo
2 eggs
½ cup sugar
¾ cup brown sugar
1 tspn Vanilla extract
1 tblspn golden syrup
1 tblspn agave syrup
⅓ cup hot water
METHOD:
Well yes you guess it, throw everything together in a big bowl... well almost, I did take the trouble of melting the chocolate with butter, syrups and water, but do not bring to a boil just heat it up so its hot enough to melt everything.
Then I poured that onto the dry ingredients which were in a large high sided mixing bowl. Whisk it all together.
Get you cupcake cups all organised into your cupcake tin and spoon out enough batter in each cup to 3/4 height of the cup.
Bake at gas mark 4 for about 15-20 minutes or until toothpick comes out "just" clean/ a bit on the sticky side BUT NOT WET BATTER. This will give you a moist and fudgy cupcake!
Remove from cupcake tray and let it cool slightly on the cooling rack, Serve hot - well as hot as one could bare to hold it of course.
AUTHOR: | 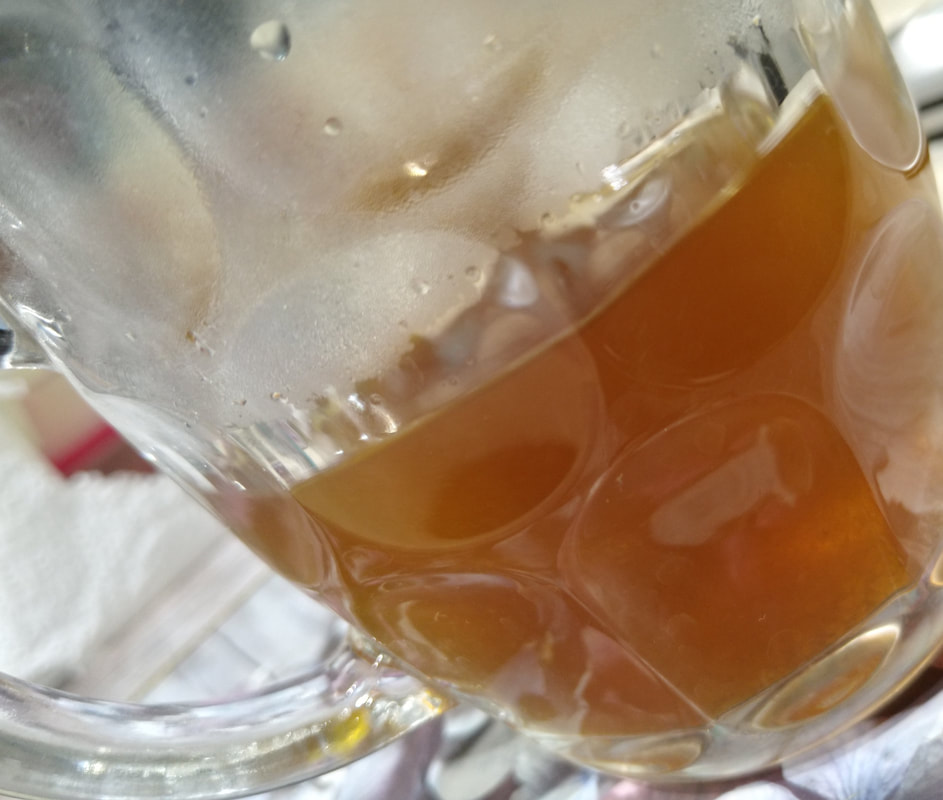 |
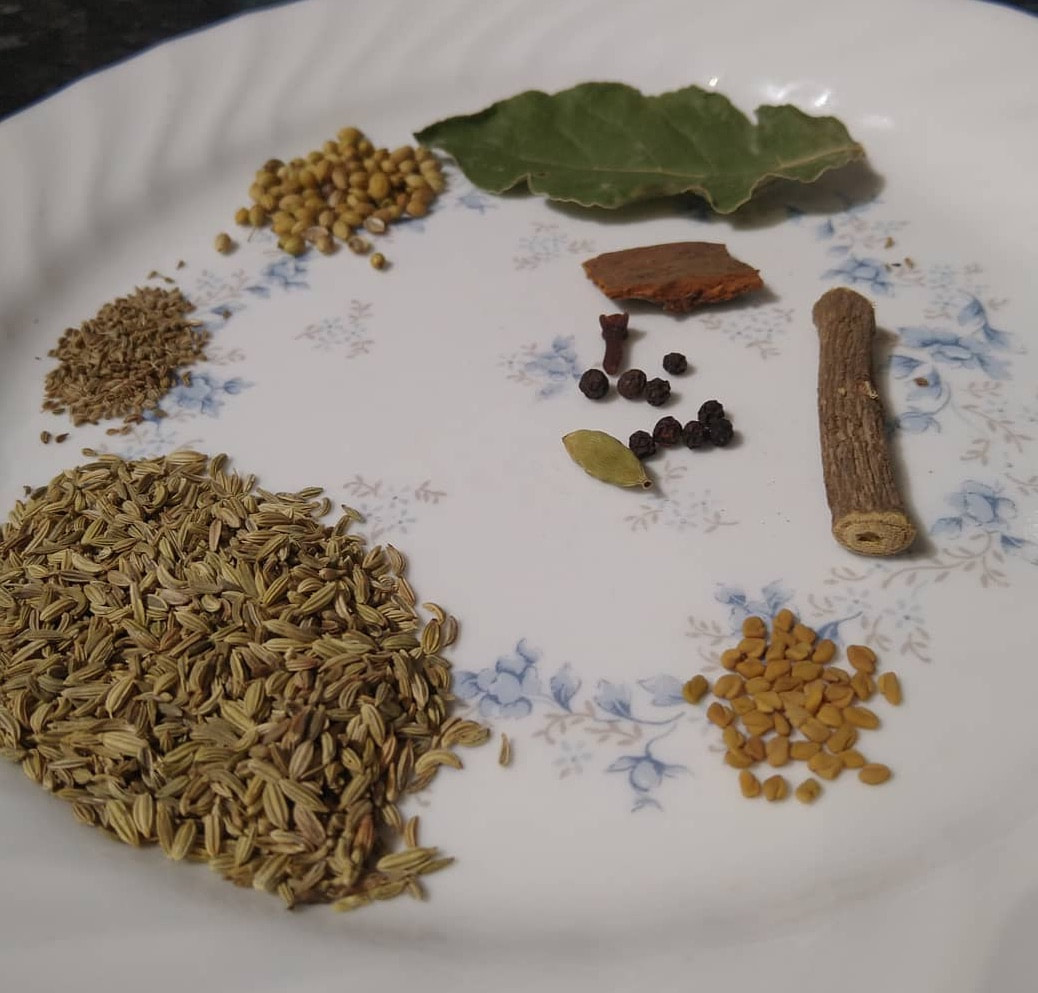
½ tspn Methi (fenugreek)
1 tablspn Saawnf (fennel seeds)
1inch piece Daarchini (Cinnamon bark stick)
1 Elechi (Cardamom)
1 Long ( clove)
10 pieces Golmirch (Peppercorns)
1 tspn Saabit Dhaniya ( corriander seeds)
½ tspn Ajwaeen ( oregano seeds)
2 inch piece Mulhati (Licorice stick)
1 big theejh pata (bay leaf)
3 inch piece Ginger peeled and chopped in three
Optional:
1 tspn Dried Pine Needle leaves

MY RECIPE BOX
My heritage spans from the flavours of Bihar to the cuisine of the Arabias, the colourful food of Bengal to the delicacies of Pakistan.
I bring together here recipes that I have been blessed enough to have been entrusted with by my friends and family; as well as my own concoctions.
My recipes are not about the show stopper artworks...for me its all about satisfied tums and satisfied mums!
SEARCH BY TYPE:
Categories
All
Baked Goods
Baking With Kids
Biryani
Breakfast
Cakes
Comfort Food
Fish Dish
Fried
Hair Care
Handy Helpers
Health Care
Immunity Boost
INTRODUCTION
Kababs
Laddu
Nourishing
Pizza
School Lunches Recipes
Scones
Skin Care
Snacks
Soups
Vegan
Archives
April 2023
January 2022
August 2021
July 2020
April 2020
November 2019
October 2019
September 2019
August 2019
February 2019
January 2019
March 2018